
The member roster
The Members page is your full roster — everyone with a membership in your organization. Click Members in the sidebar to open it. Four tabs sit under the title: All Members, Waitlist, Expired, and Trash, each with a live count when it has members, so you can move between the active roster, the queue, lapsed members, and recently removed members without losing your place.
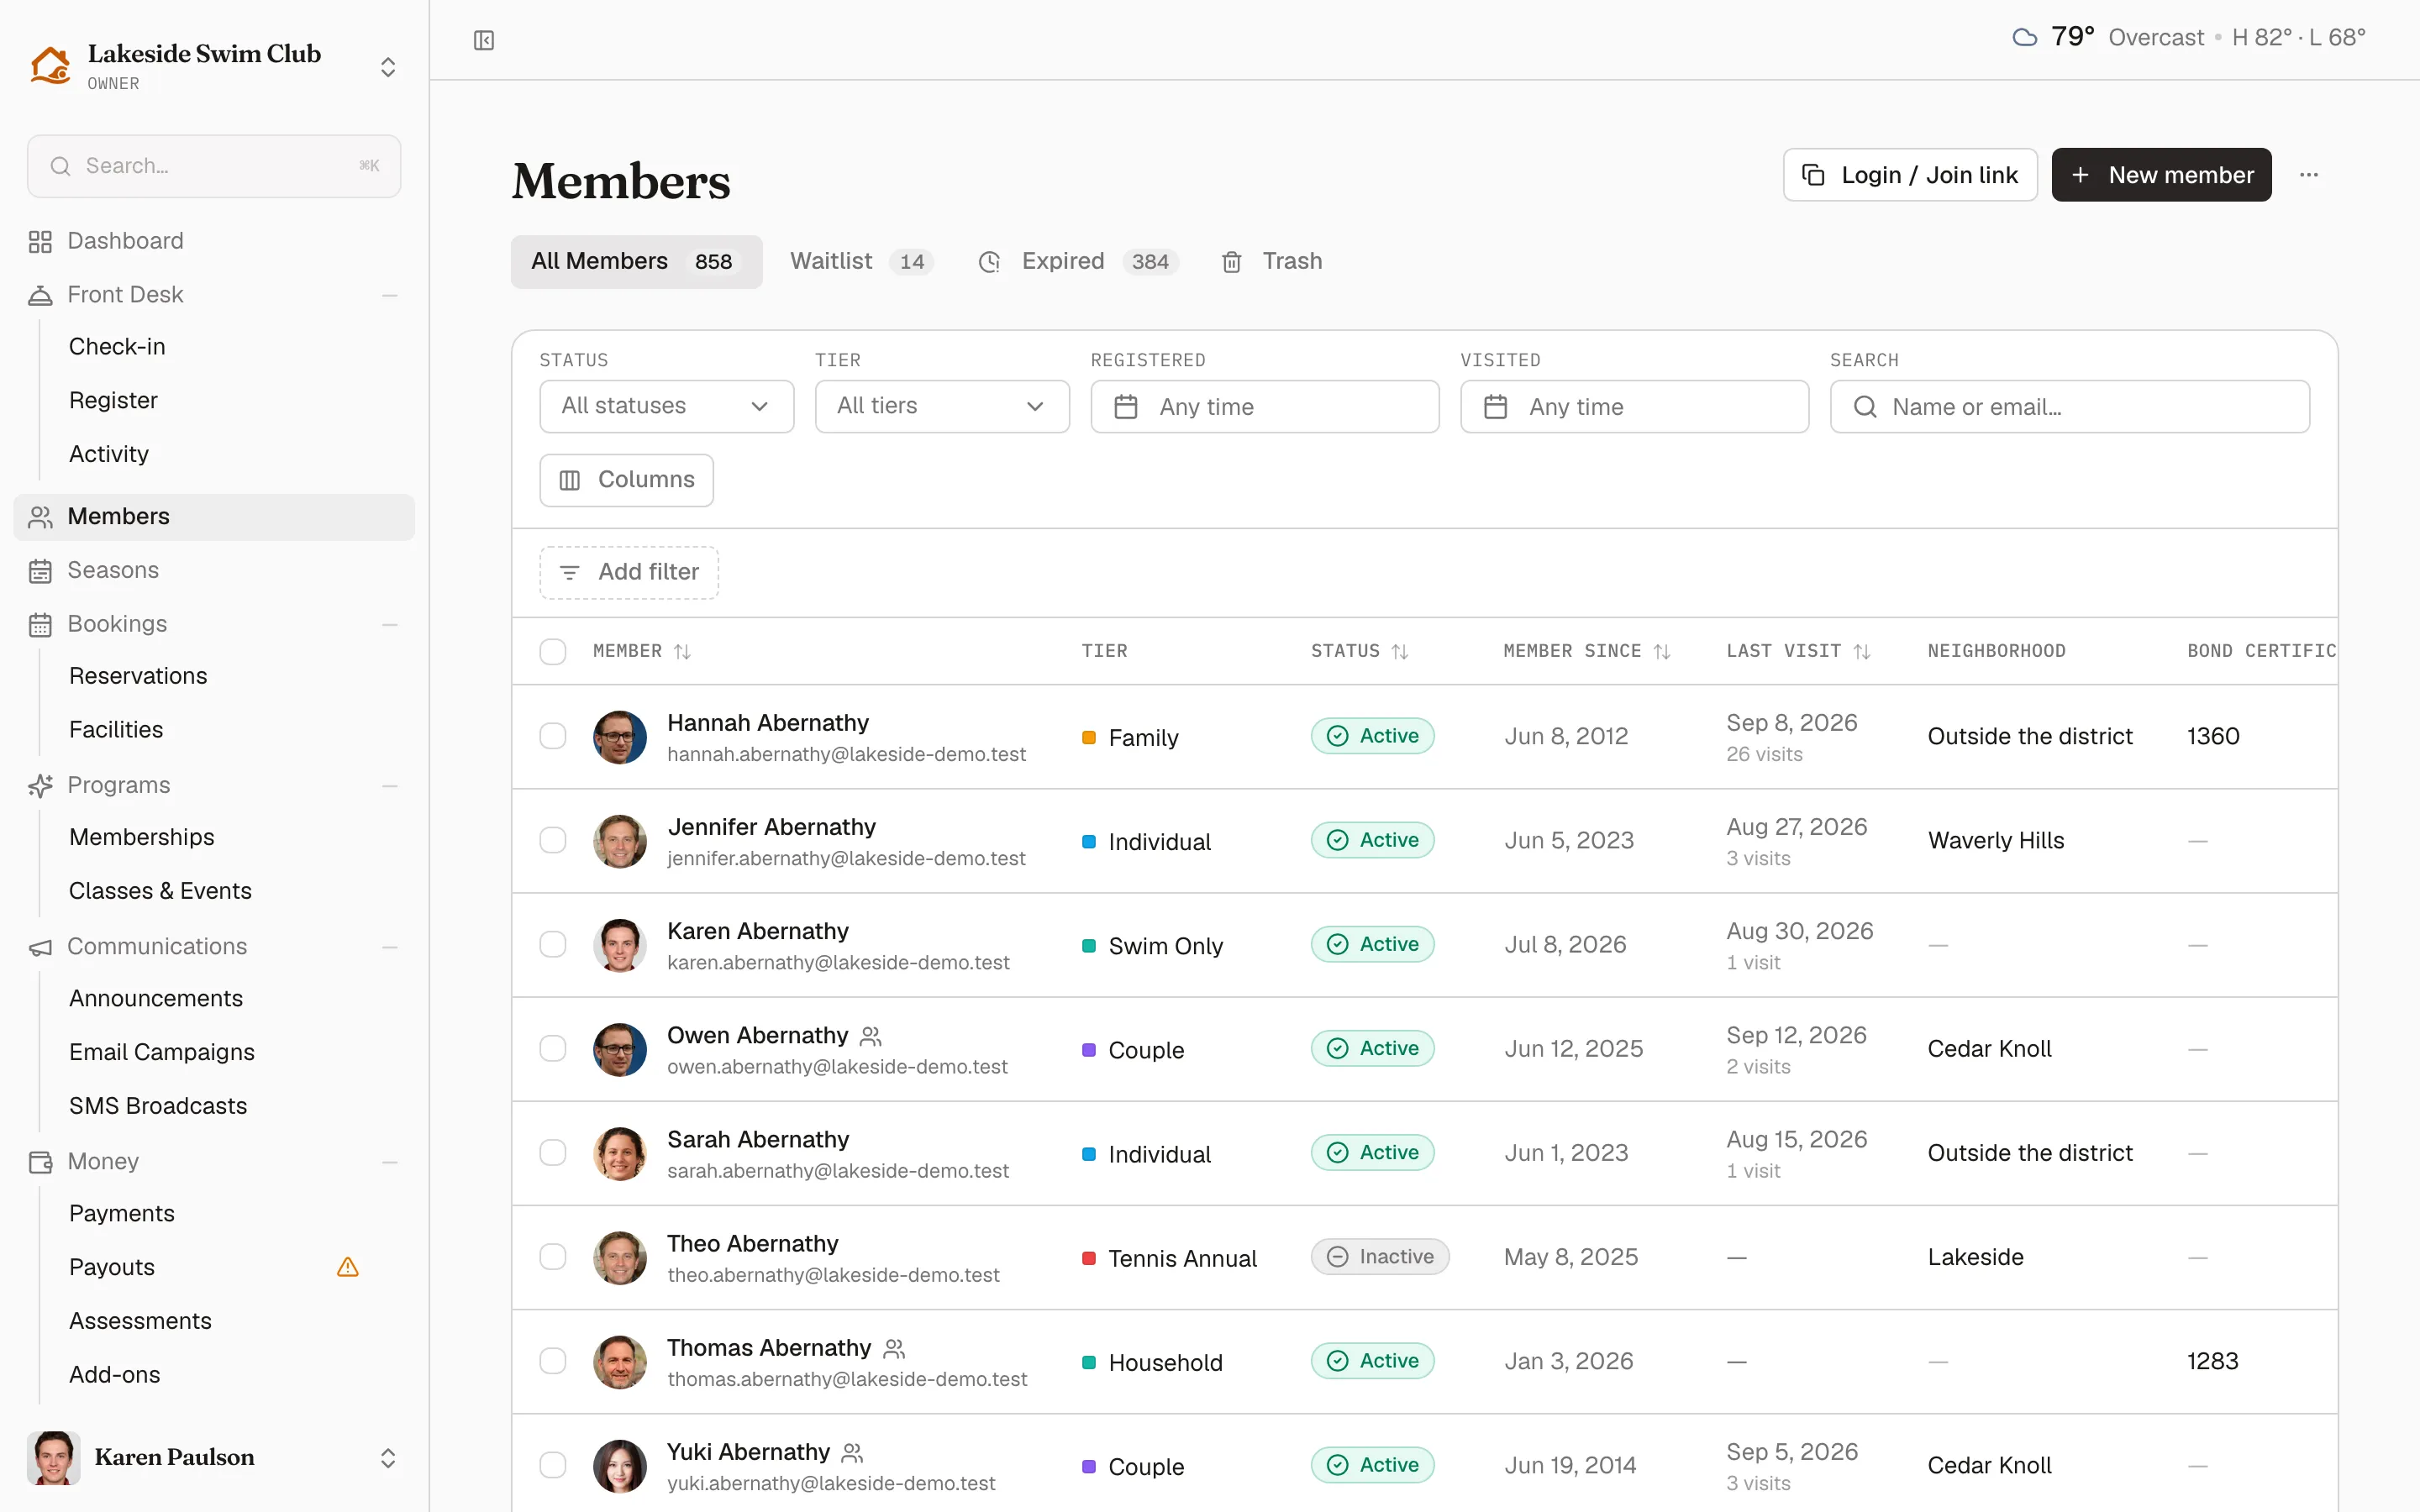
Two buttons sit in the header: Login / Join link copies your portal link for members to sign in or join (when a season is open, its public Join goes to that season’s membership picker), and New member opens the create drawer. The ⋯ menu beside them holds the roster’s admin chores — Import, Export, and Manage fields (your custom fields, shown when you can manage them).
Find members
Section titled “Find members”The toolbar above the table filters the roster:
- Status — multi-select across Active, Awaiting payment, Inactive, Pending, and Rejected. Waitlisted members live on the Waitlist tab, and expired members on the Expired tab.
- Tier — multi-select across your membership tiers.
- Registered and Visited — date ranges: when the membership record was created, and whether the member checked in during the window.
- Search — name or email. The search applies when you leave the field or press Enter.
Reset clears everything at once, and while any filter is on, the number of members matching sits beside it — so you can narrow the roster and read the count without scrolling to the table’s footer. If you’ve placed custom fields on the roster, an Add filter button appears under the toolbar and each choice you make becomes a removable chip beside it.
Choose the columns and the sort
Section titled “Choose the columns and the sort”Columns, in the filter toolbar, decides what the table shows. Its Show columns section toggles the four built-in columns — Tier, Status, Member since, and Last visit. All four start on and any of them can be turned off, and the menu stays open so you can set several in one pass. When you’ve placed custom fields on the roster, a Custom columns section lists them underneath by their own labels, with the first three showing by default.
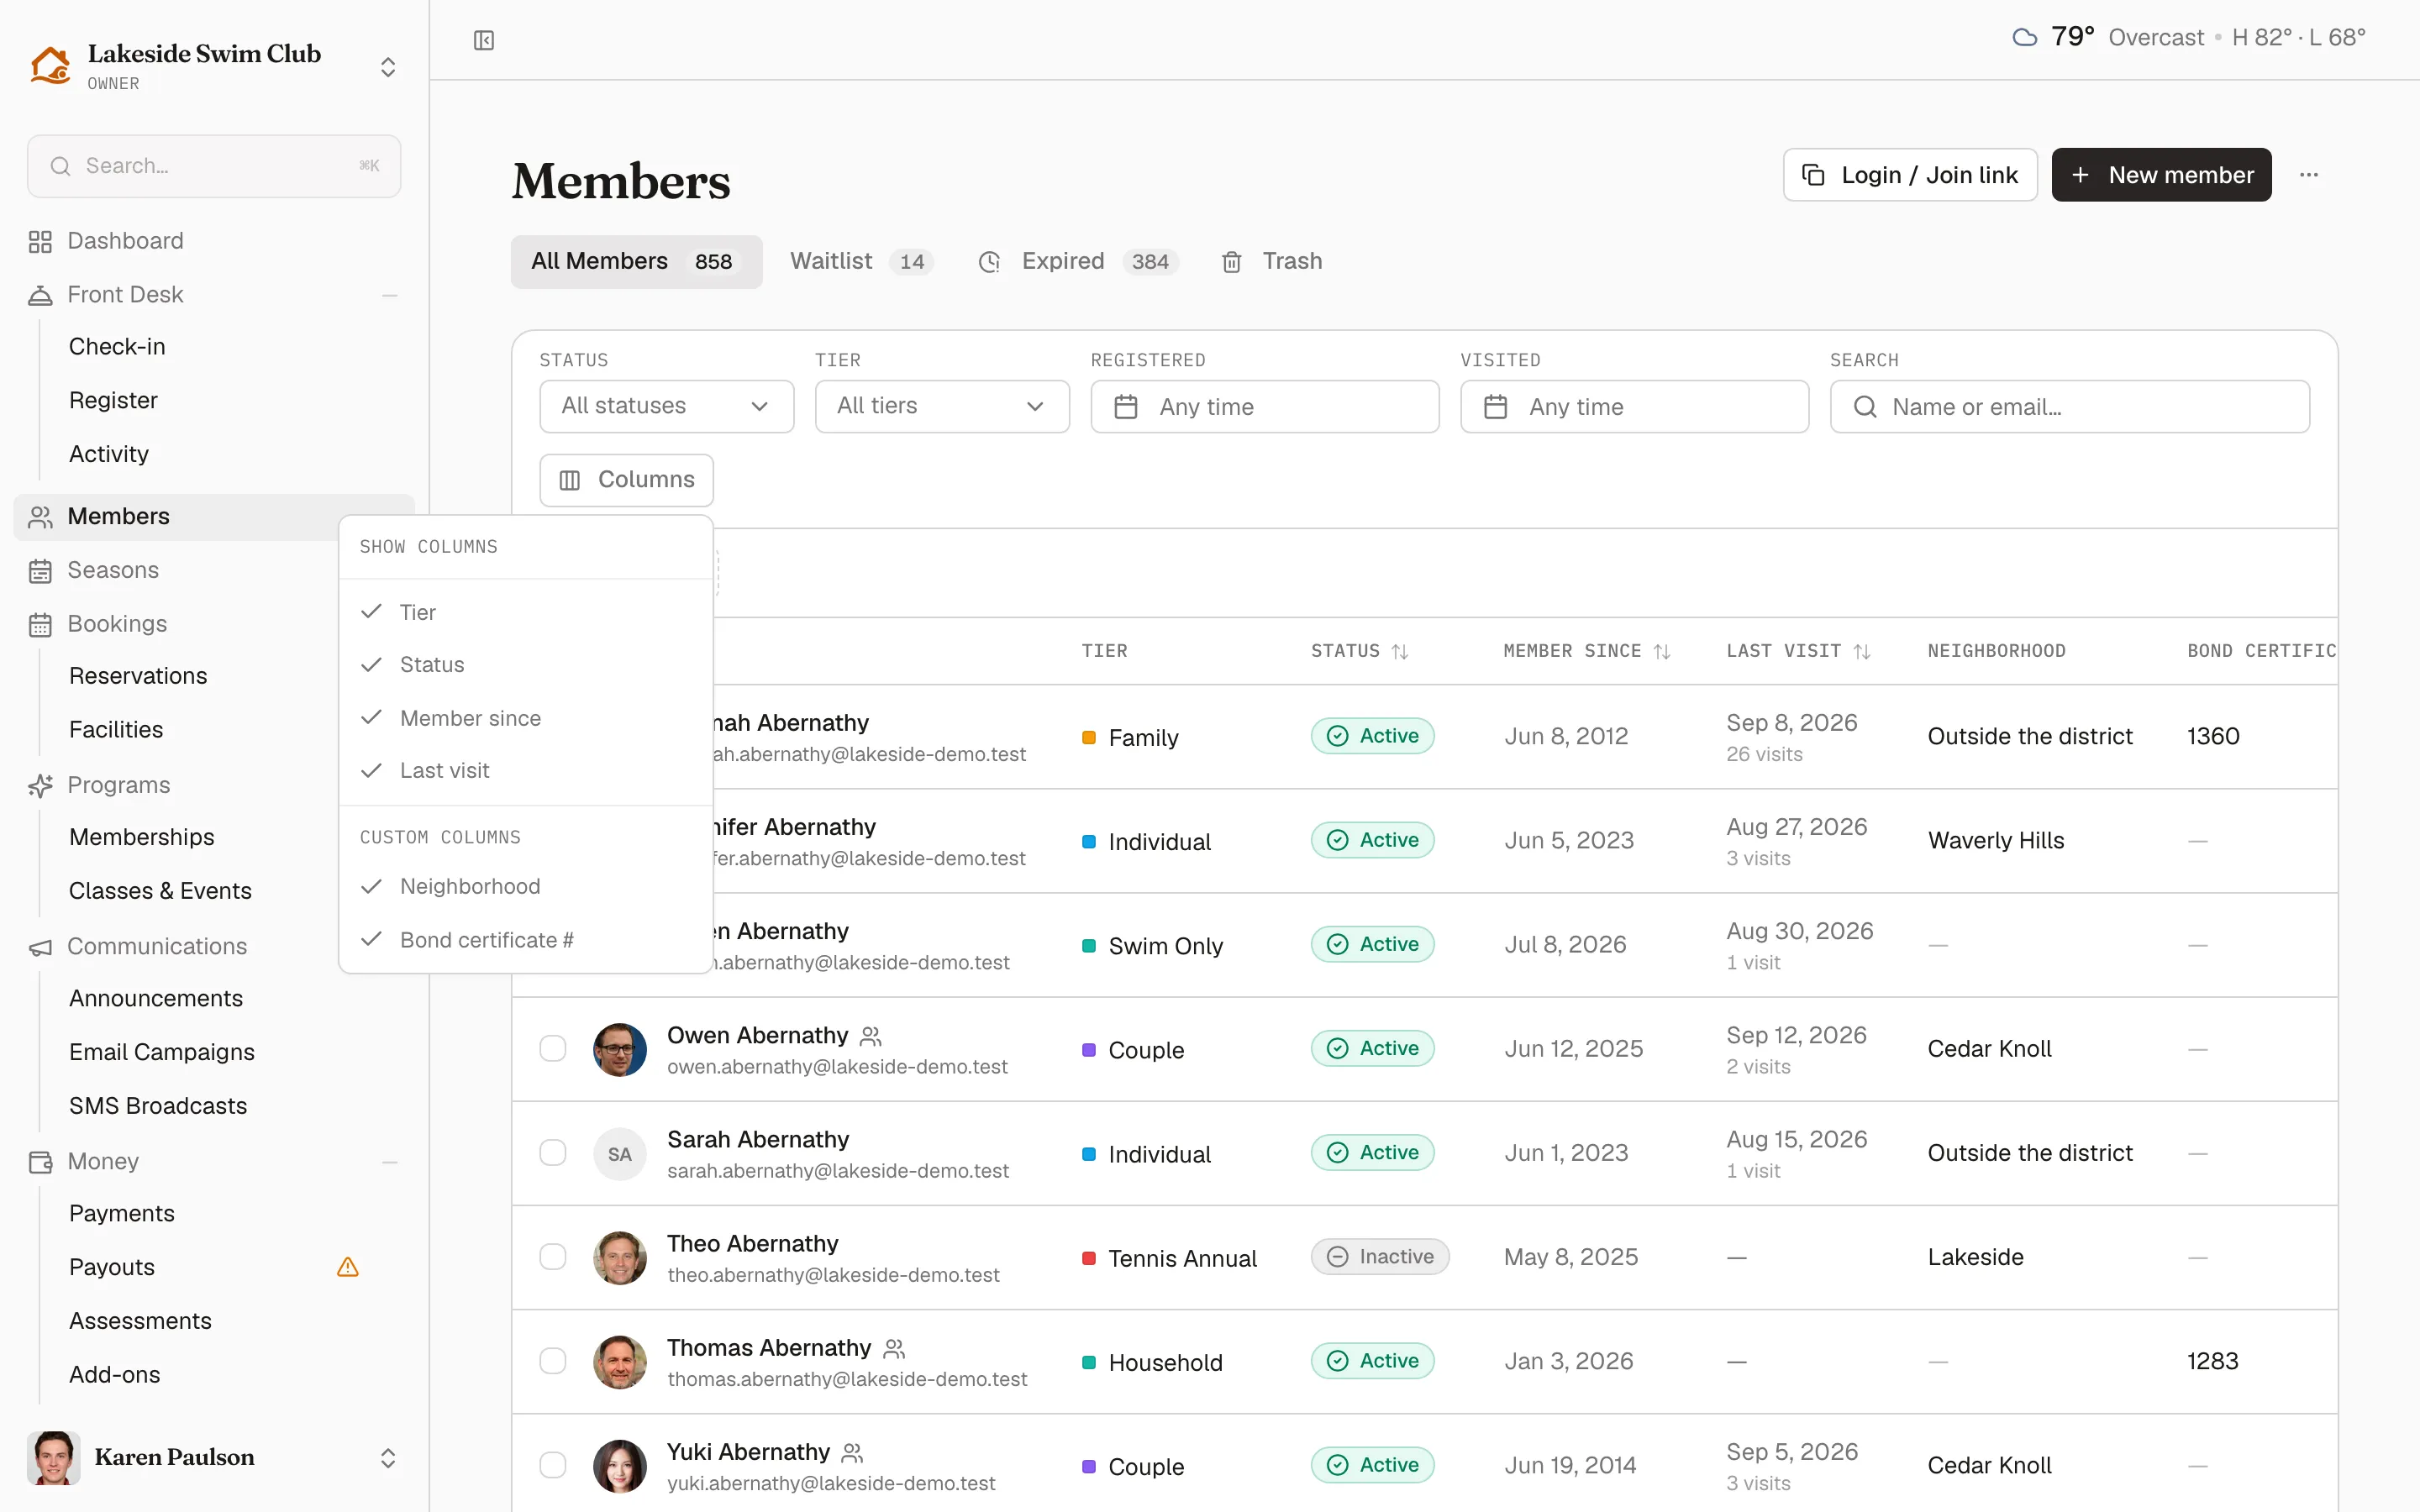
The two halves are remembered differently, which matters when you want to hand a view to someone else. Built-in column choices are stored per admin, per organization, in the browser you’re using — nothing goes to the server, so signing in elsewhere starts you back at the defaults. Custom columns ride in the page URL instead, so a filtered, columned roster can be shared as a link and arrive looking the same. There’s no reset for columns: Reset clears filters only.
Click Member, Status, Member since, or Last visit to sort by it. The server orders the entire roster rather than the page you’re looking at, and the order rides in the URL alongside your filters, so it survives paging and reloads. Tier is the exception — it shows each tier’s color swatch beside its name and doesn’t sort.
What each status means
Section titled “What each status means”Status is the single most useful thing to filter on, and the words are easy to mix up:
- Pending approval — applied through your portal and waiting on your decision. They can’t use anything yet. The pill and the dialogs spell it out; the Status filter and the Update status menu shorten it to Pending. See Approving new members.
- Awaiting payment — approved (or invited to renew) but the dues haven’t been paid. The membership activates the moment payment lands.
- Active — paid up and using the club. The only status that counts toward a tier’s capacity.
- Waitlisted — queued for a full tier. Managed on the Waitlist tab, not here.
- Expired — an invitation to pay lapsed: the member never completed payment inside the grace period. Listed on the Expired tab.
- Season ended — the membership ran to the end of its season. Underneath these are Inactive, but they’re kept off the roster and listed on the Expired tab instead, where the pill reads Season ended and hovering it names the season and the date it closed. They can re-register for a new season.
- Inactive — archived by staff. The account survives, the access doesn’t.
- Rejected — an application you turned down, kept for the record.
Because season-ended memberships never appear here, filtering Status → Inactive returns only the members staff archived on purpose — to find the rest, open the Expired tab.
Act on a single member
Section titled “Act on a single member”Each row’s ⋯ menu offers:
- View as member — preview the app as they see it. See Viewing the app as a member.
- Update status — set Active, Pending, Awaiting payment, Expired, or Inactive (archived). A confirmation explains the change and offers an Email the member about this change checkbox.
- Send payment reminder — awaiting-payment members only.
- Reject application… — pending applications only. See Approving new members.
- Archive — sets the membership to inactive; the account is preserved but the member loses access.
- Move to trash — removes the member from the roster and emails them that their membership was removed. The dialog asks you to type
confirmfirst, and points out that setting them Inactive preserves the member and their records instead.
Archive is the gentler of the last two: the member disappears from the active roster but keeps their account and history, and nobody is emailed. Reach for Move to trash only when the member should be gone — it notifies them, and the record is deleted for good after 30 days, though it can be restored from the Trash tab until then.
Pending rows also show a checkmark button to approve the application in one click.
Work in bulk
Section titled “Work in bulk”Select rows with the checkboxes — selections persist as you page through results. When every row on the page is selected, a prompt offers Select all … members matching the current filters to extend the selection across every page. The floating bar then offers:
- Set status — the same options as the single-row menu, with the same email-the-member checkbox. Members already in the chosen status are left unchanged.
- Change tier… — pick a new tier and a Billing mode: Upgrade for free (no charge or refund), Request payment (creates a pending invoice for the price difference and emails each member), or Automatically charge (charges each member’s saved card; members without one are skipped).
- Move to trash… — large batches show a progress bar as they process.
Export to CSV
Section titled “Export to CSV”- Open the ⋯ menu in the header and click Export.
- In the Export members to CSV dialog, check the columns you want — Name, First name, Last name, Email, Phone, Status, Membership Tier, Tier Price, Joined, Family Members, Visits, Last Visit, plus any export-placed custom fields.
- Click Download CSV. The current filters are applied to the exported file. Family Members is a count per member, not one row per person, so the export doesn’t carry households in a form the importer can rebuild.
The Trash tab
Section titled “The Trash tab”The Trash tab lists removed members. Each row’s ⋯ menu offers Restore — which returns the member to the roster with their previous membership details — and, for staff with the permission, Delete permanently.